k3s: Lightweight Kubernetes Distribution first experience

Rancher introduced alsmost week ago k3s, a lightweight Kubernetes Distribution. In the YouTube video below you hear Shannon Williams and Darren Shepherd from Rancher talk about K3S, what it is, the usecases and demo of K3S.
k3sis a fully compliant, production-grade Kubernetes distribution that maintains an absolutely tiny footprint. Weighing in at less than 40 MB, it only needs 512 MB of RAM to run. This means it’s perfect for all kinds of computing that requires a minimal about of memory and space.
k3s is designed for Edge computing, IoT, CI, and ARM. Even if you’re working with something as small as a Raspberry Pi, k3s allows developers to utilize Kubernetes for production workloads. It simplifies operations, reducing the dependencies and steps needed to run a production Kubernetes cluster.
Installation is a breeze, considering that k3s is packaged as a single binary with less than 40 MB. However, security isn’t an afterthought, since TLS certificates are generated by default to make sure that all communication is secure by default.
Installation
As k3s is built for running on hardware like the Raspberry Pi,I thought it would be interesting to take a closer look at the product and install it on my Raspberry Pi.
My home setup
My home setup is not where it should be yet but two Pi's is enough to start with. My plan is to add some more PI's in the future so I will be able to have multiple nodes and when k3s also supports HA, I can also add an extra master.
Currently I use the following equipment for my k3s environment
- Raspberry PI 3B+ (2 at the moment. 2 other will be added later)
- 16 GB SD card (2)
- TP-Link TL-SG105 - Switch
- Anker PowerPort+ 5 Binnen Zwart
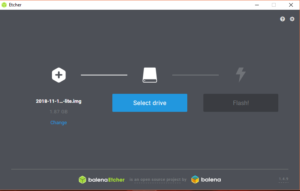
So I started with preparing the Raspberry Pi's. First I downloaded raspbian-stretch-lite from Raspbian.org. Then I used Etcher from Balena to flash the SD-cards with the image I downloaded. I used 2018-11-13-raspbian-stretch-lite.

Before I powered on the Raspberry Pi's I mounted the sd-cards again and created a file in the root of the boot volume so that I could ssh to the PI's
The following steps should be run on all Raspberry Pi's that will be part of the cluster.
1touch ssh
After that I powered on the Raspberry Pi's and connected to them using ssh. To make it myself easy I assigned ip-addresses based on the mac-addresses of the Raspberries in my router. The default password for the PI user is raspberry.
1ssh pi@192.168.2.100 #this is the ip-address of my Raspberry that will run as master
The next step was setting up the host name, changing the password and setting the ip configuration. The
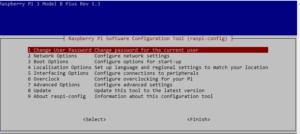
changing of the host name and password can be done by raspi-config.
1sudo raspi-config

After changing the host name, choose Finish and reboot the Pi. Next stepping was setting up the network configuration. The network configuration can be configured in /etc/dhcpcd.conf
1profile static_eth0
2static ip_address=192.168.2.100/24 # replace this with your node's ip-address
3static routers=192.168.2.254 # replace this with the router address
4static domain_name_servers=8.8.8.8
Next step is turning off swap.
1dphys-swapfile swapoff && \
2dphys-swapfile uninstall && \
3update-rc.d dphys-swapfile remove
Next step is adding the following line to /boot/cmdline.txt.
Don't add any new lines! After saving the file reboot and login.
1cgroup_enable=cpuset cgroup_memory=1 cgroup_enable=memory
These step should only be run on the Pi that will have the role of master
1curl -sfL https://get.k3s.io | sh -
2# Check for Ready node, takes maybe 30 seconds
3k3s kubectl get node
Default k3s doesn't assign roles to the nodes and allows for pods to be scheduled on the master. If you want you can change that with the following commands
1# label node as master
2kubectl label node mymasternode kubernetes.io/role=master
3kubectl label node mymasternode node-role.kubernetes.io/master=""
4# exclude master from scheduling pods
5kubectl taint nodes mymasternode node-role.kubernetes.io/master=effect:NoSchedule
On the node run the following commands
1curl -fSL "https://github.com/rancher/k3s/releases/download/v0.1.0/k3s-armhf" \
2  -o /usr/local/bin/k3s && \
3chmod +x /usr/local/bin/k3s
After that you start the agent
1# NODE_TOKEN comes from /var/lib/rancher/k3s/server/node-token on the master
2sudo k3s agent --server https://myserver:6443 --token ${NODE_TOKEN} &
Optionally you can also set a label for the node. The commands should be run from the master node
1kubectl label node mynode kubernetes.io/role=node
2kubectl label node mynode node-role.kubernetes.io/node=""
You are now ready to run a pod. As first pod to run I chose Nginx. Create a file at /home/pi/nginx-test.yaml with the following content
 1---
 2apiVersion: v1
 3kind: Service
 4metadata:
 5  name: nginx-unprivileged-test
 6  namespace: default
 7spec:
 8  type: NodePort
 9  selector:
10    app: nginx-unprivileged-test
11  ports:
12  - protocol: TCP
13    nodePort: 30123
14    port: 8080
15    name: http
16    targetPort: 8080
17---
18apiVersion: extensions/v1beta1
19kind: Deployment
20metadata:
21  name: nginx-unprivileged-test
22  namespace: default
23spec:
24  replicas: 1
25  template:
26    metadata:
27      labels:
28        app: nginx-unprivileged-test
29    spec:
30      containers:
31      - image: nginxinc/nginx-unprivileged
32        name: nginx-unprivileged-test
33        ports:
34        - containerPort: 8080
35          name: http
36        livenessProbe:
37          httpGet:
38            path: /
39            port: http
40          initialDelaySeconds: 3
41          periodSeconds: 3
Next step is deploying to the cluster
1kubectl apply -f /home/pi/nginx-test.yaml
Since this is a NodePort service, k3s will open a port on the Raspberry Pi at 30123. On my local network, the Raspberry Pi is located on 192.168.2.100

A lot of more possibilities and stuff to find and try out. It is very easy to install Kubernetes and get a pod running. Looking forward to the upcoming releases.
If you want to hear more about k3s, you can attend the online meetup k3s: The Lightweight Kubernetes Distribution Built for the Edge. You can register here
As input for the post I used the following sites:
Another interesting blog is K3S sur un cluster de Raspberry Pi, Blog Zenika
